
Oh, bathrooms. We need them. We don’t like to think about them. We don’t want to be without them. Even if we know that there’s something needing some repairs, we keep putting it off.
We knew when we bought the house that there were two old water leaks, which we’d corrected early on, and that we’d eventually need to address some already-weakened floor under the toilet and tub.
How bad was it?
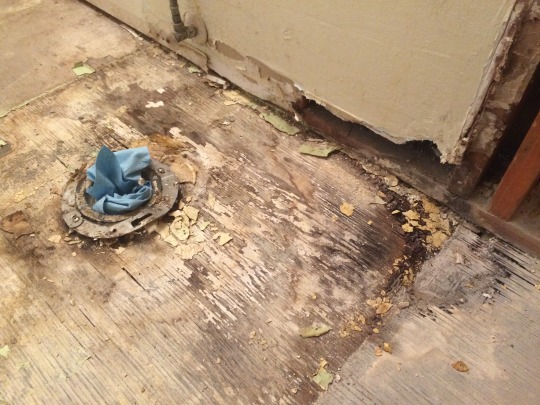
Here’s what it looked like when we moved in – with some evidence of someone having used wood filler in an attempt to shore up the problem around the 3″ closet flange:
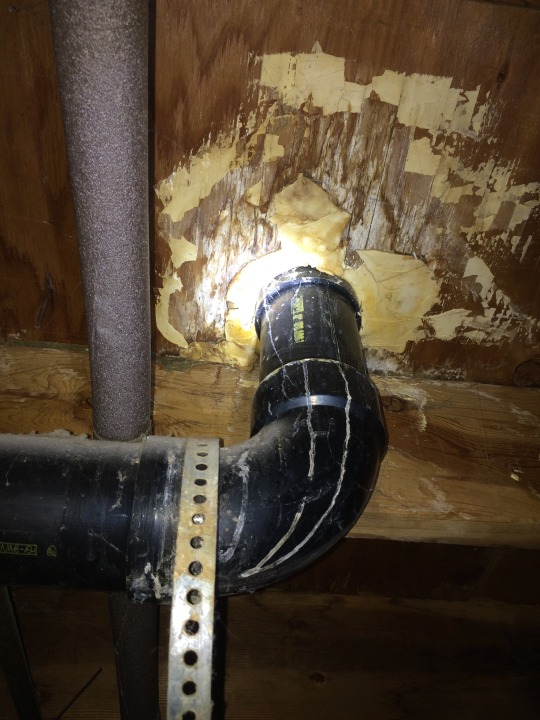
Rather poor condition.
So, last Thursday, that flange finally failed. Time to pull the toilet out. But, as it goes, removing one problem reveals another. Then another.
Everything must go!
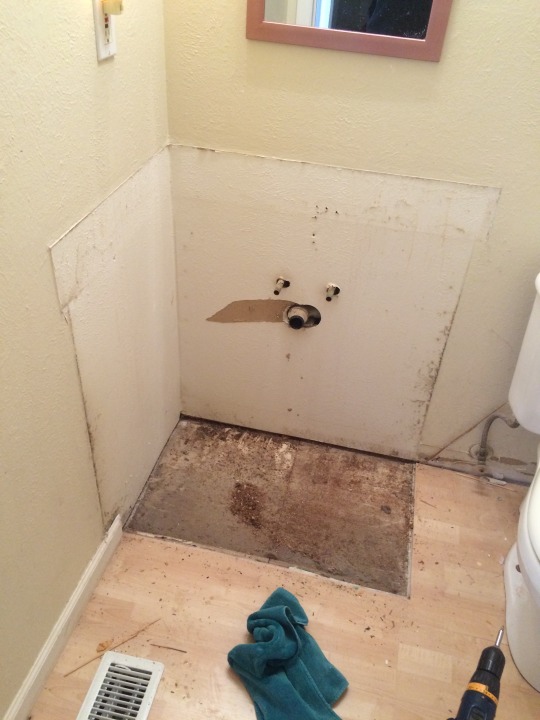
Yep, everything.
1973, builder-grade vanity? Gone.
Some explanation of this one may be needed – see, the old shower surround was really a cheap plastic kit that a previous homeowner/tenant had glued to the tile. So, I pulled it off and found this:
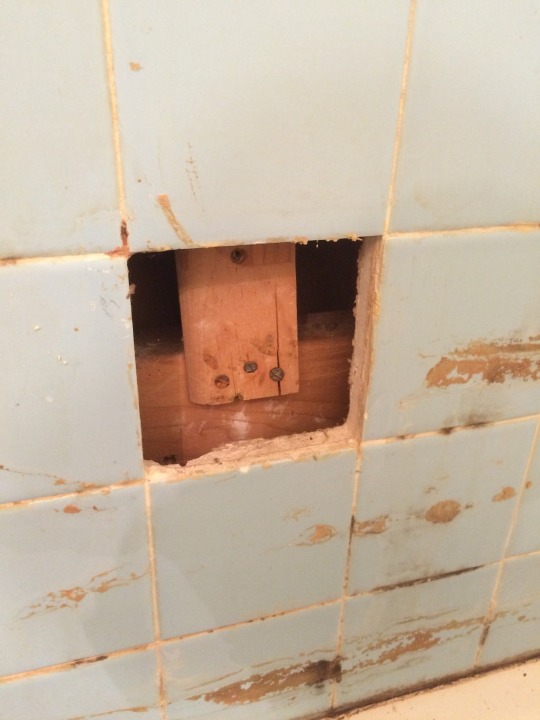
No idea why a single tile was cut out.
Oh, it gets more strange.
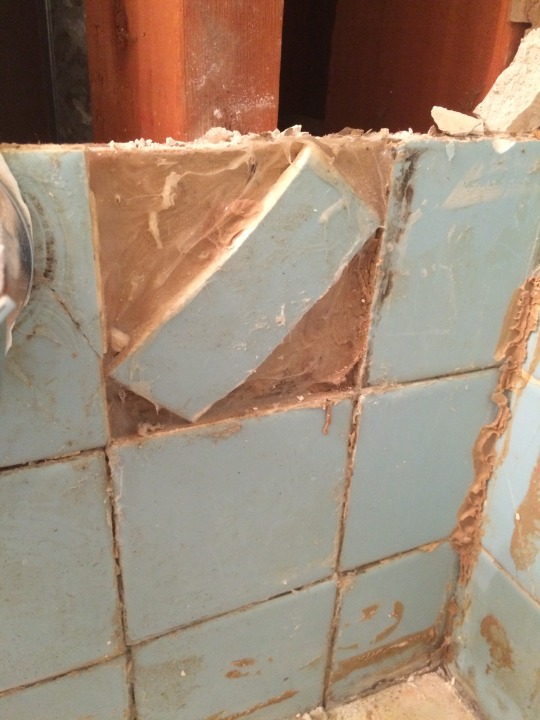
Yep, that’s half a tile that has been turned and glued in to where a lost tile was. No idea why.
There was also an amazing amount of silicone caulk and adhesive around the shower valve and the wet end of the tub. I can only assume that they thought they had a leak somewhere, so they just sealed everything.
Keep digging until we get to good structure.
With the tub out, we can see the top of the subfloor, and how much damage it really has.
So, what’s the actual leak? On the right side, the water damage is from splash and spray from the shower, which weakened and rotted the floor and drywall. That weakened the floor around the closet flange, which itself is really inadequate by today’s standards, which then failed, too.
Everything must go!
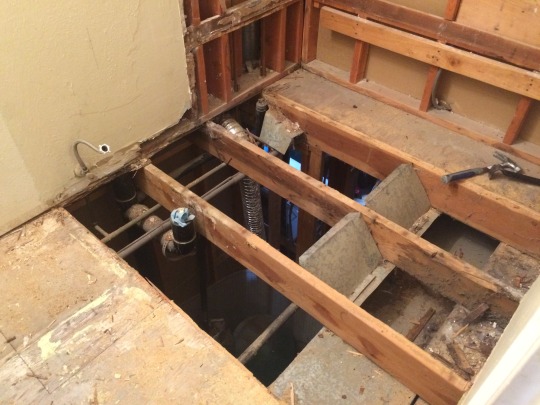
The joists are actually in surprisingly good condition. Time to clean up all the tear-out mess and that cold-air return duct and move on to reconstruction.
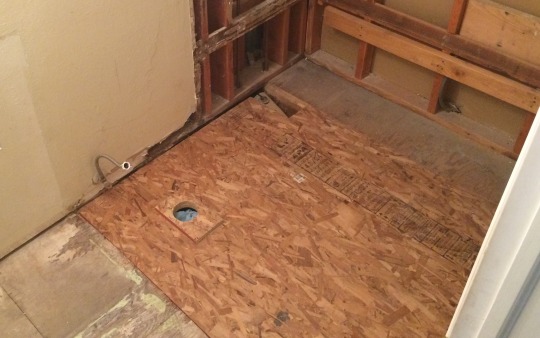
Some new OSB cut to fit, adhered with correct adhesive and fasteners to the joists. I also added a spacer to the correct height to support the closet flange on the finished floor.
Now, let’s install a tub:
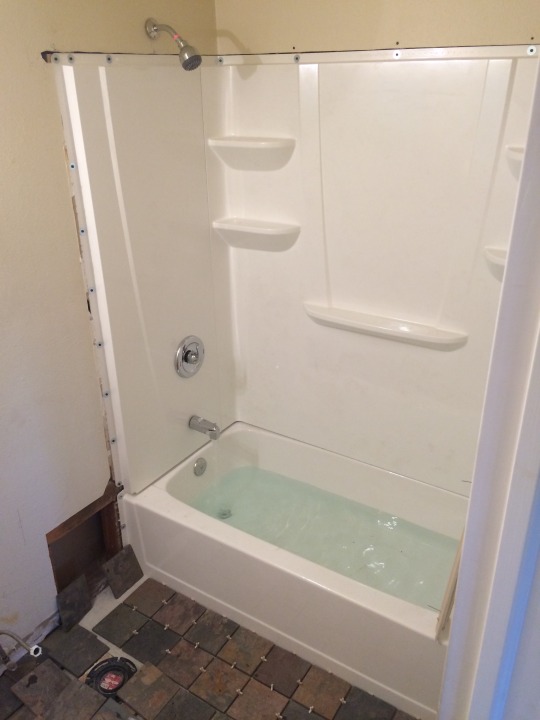
No leaks. That’s a good sign. Although I do need to make a new stem for the spigot, but 3/8″ shorter.
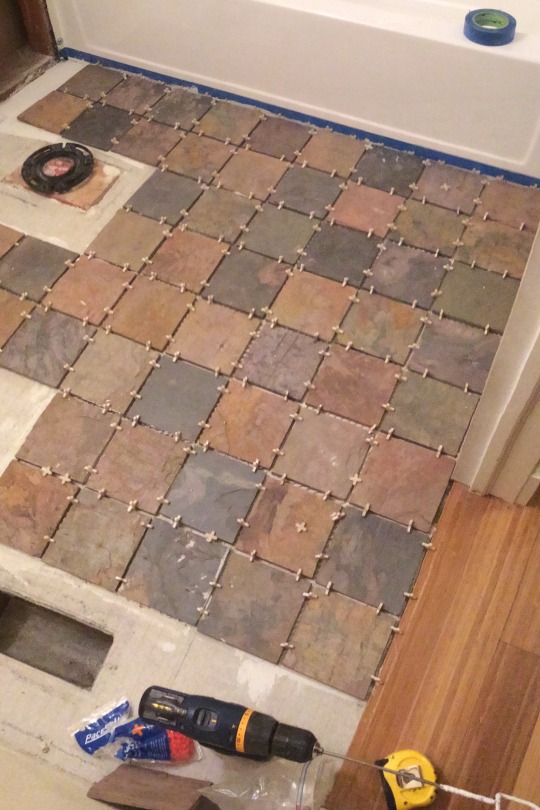
Yes, natural slate in a bathroom. I’ve had natural slate in the front entry for nine years and they’ve been completely maintenance free.
Unlike the slate that I bought and installed in the front entry many years ago, this batch tends to be mostly not-square and highly-varied in thickness. Frustrating. So, the spacers here are more what you might call guidelines than actual rules. Shift here. Shift there. Adjust for not-square walls, and… hopefully the end result will be worth it.
There’s the three days’ work so far. I’ll get the rest of the tile in this evening including all the cut pieces, then get it grouted tomorrow evening.
With luck and good timing, I’ll get the toilet installed by the following afternoon. That’s a good thing, too, because by then, we’ll need to take the trailer out to empty the tanks.
